Showing posts with label holiday decor. Show all posts

Wednesday, November 30, 2011

Design*Sponge Ornament Round-up.


I was beyond thrilled yesterday when I discovered that one of my ugly sweater polar bear ornaments was included in the Design*Sponge ornament + trimmings round-up! For this post Grace has collected close to 100 ornaments to share with her readers. 


There is my polar bear above, settled in nicely with a couple of other arctic looking lovelies. To celebrate I'm offering 10% off in my store through today with coupon code "DESIGNSPONGE".


Be sure to pop on over to Design*Sponge to feast your eyes on all of the wonderful ornament collections- there's something for everyone!

Tuesday, November 29, 2011

One Last Ugly Sweater Polar Bear Ornament.


I've added one (probably) last polar bear ornament to the shop for this season. This guy is sporting a zig zag and pine tree sweater. He's so nice and toasty warm.


You can find this bear and his one-of-a-kind sweater here.

Saturday, November 26, 2011

DIY Christmas Yarn Tree Tutorial.


The Christmas bug bit me a little bit harder this year, and I decided that I wanted to do just a wee bit more decorating than usual. My great-grandmother had beautiful dark green ceramic Christmas trees in her house when I was growing up. An electric candle went inside, and when lit the dark, richly colored bulbs would cast a dull, warm glow. I am blessed enough to have one of those trees now, but the candle is missing, and I'm always afraid to put it out for fear one of the wee ones will knock it over and break it. So this year I thought it would be fun to re-create the look of that tree with yarn and pom poms. One trip to the craft store later, and I had all the materials I needed to create a couple of fun yarn trees inspired by my great-grandmother's vintage tree decoration!


SUPPLIES.               styrofoam cones (mine are 6" and 9")
                  yarn
                  felt to match yarn color
                  small pom poms (I used 10mm)
                  hot glue gun
                  scissors

If making a star for the top you'll also need: felt, matching embroidery floss, sewing needle, a wee bit of polyester fiberfill, toothpick.


To start, cut two circular pieces of felt that will cover the very top and bottom of the styrofoam cone. Adhere them using hot glue.

*A note about using hot glue with styrofoam: exercise great care not to melt the styrofoam by touching it with the hot metal tip of the glue gun.


Run a bead of glue along the bottom of the cone to keep the yarn in place, and then proceed to wrap the rest of the cone with the yarn. Once at the top of the cone cut the yarn and use hot glue to keep the end in place.


To create the look of lights, put a dab of glue on the back of each pom pom and stick it in place. Then, starting at the uppermost pom pom, take a piece of yarn and run it from one "light" to another, wrapping it once around each pom pom in the tree as you pass it to create a "string of lights". Once you have the string arranged in a way that looks pleasing put a dab of hot glue at the beginning and the end to hold the string of yarn in place.


If you decide to add a star to one or more of your trees, you can use the template below. Be sure to click on the image and print it in original size so that the star will be the correct size.


Once you've printed the template cut two stars from the yellow felt, and stitch around the edges. Lightly stuff the star with fiberfill before stitching it shut to give it a bit of dimension. Slide the toothpick into the star, and then gently push the toothpick into the styrofoam on top of the tree.


I did the smaller tree first with my four-year-old daughter, and we went a little crazy with the pom poms. When I did the larger tree I placed the pom poms farther apart, and I believe I like that better. However you decide to do it, have fun, and I hope that these little trees add more merry to your holidays!

Wednesday, November 23, 2011

Polar Bears in Sweaters (and free shipping)!

I've been having a ball stitching up new ornaments for the shop. Today I introduced my new polar bears in ugly Christmas sweaters. Right now there are only two available, each with one-of-a-kind sweaters. Polar bears are so tough that no one sneers at them for wearing ugly sweaters; plus they really love their grandmas so they wear their handmade sweaters with pride.


There's a smaller guy in a green sweater available here.


And this fella with his snazzy red sweater is available here.

Now through Cyber Monday (11/28) these guys, along with owl ornaments, and seasonal holiday items ship for FREE! Use coupon code "BLACKFRIDAY2011" for free US shipping on all other items in the shop.

Also, be on the lookout for some NEW owl ornaments coming to the shop this weekend!

Monday, November 14, 2011

Lowe's Creative Ideas Magazine :: Holiday 2011


The latest edition of Lowe's Creative Ideas Magazine found its way into my mailbox last week. Of course it's chock full of holiday season goodness! Below are my three favorite DIYs from the issue.


Use square dowels to create a wooden star of David. Leave it plain or snazz it up with fabric or wrap it in yarn!


Using peel and stick shelf liner create an optical Christmas tree on your steps! If we didn't have carpeting on our stairs I would totally be doing this. It's magical!


Ceiling medallions and PVC endcaps create sweet cake stands. Simple and sweet!

If you'd like to have Lowe's Creative Ideas magazine delivered to your mailbox, sign up here. It's FREE!

Owl Sale.


I have a good amount of white and cinnamon felt, so I thought it would be fun to offer a sale on my snowy and brown owl ornaments! For a limited time only you can order them for 30% off. Sale price good through Cyber Monday (11/28).


These little guys are perfect for a woodland Christmas tree. They're especially great when there are little hands around (or even playful cats), as they won't break if knocked down. But the absolutely best part is they don't have to be put away with the rest of the Christmas decorations: they are equally as happy hanging from a door knob too. Go here for the white owl, and here for the brown owl.


Wednesday, November 2, 2011

New Owls Flying in for Christmas!


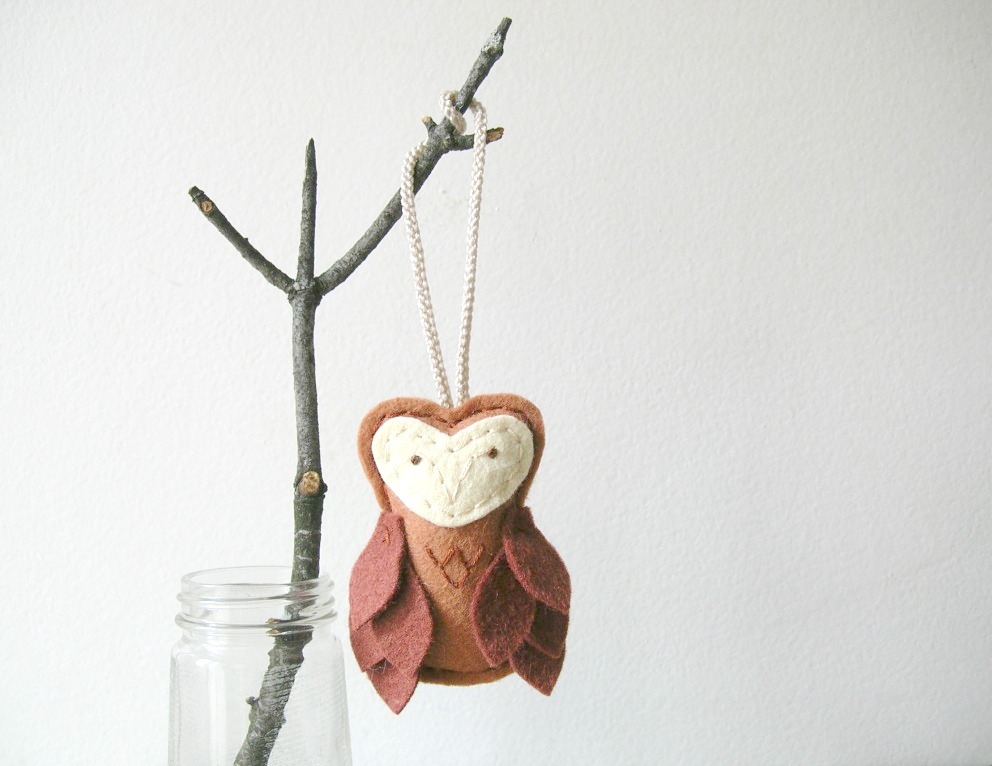
I'm sure it's no secret that I love making these owls. It's so much fun to watch their little personalities shine through as I add their face and wings. For the holiday season I've added a Special Edition Bronze Owl Ornament to the shop; he's extra snazzy and full of Christmas cheer.


When my Mom asked for an owl ornament for herself I was inspired to create one based on her living room wall color. My mom, as the matriarch of our family, has certainly continued to make all of her daughters and their families feel as much at home as ever (and my parents bought their house after I was married, so I never even lived there!). This wee owl is called "Little Miss Hospitality" in honor of my sweet Mama.


Just for the holiday season, I've also bundled owls together. You can choose five owls at a discount of 20%! Instant collection for decorating your home; this listing is also perfect for those who wish to give owl ornaments as gifts.


If five is too many, there is also the option for purchasing three at a time (also at a discounted rate). You can mix and match colors, or get all the same. So fun!


Not only are these guys an adorable accent to a bohemian home, they are also a great choice for homes with little ones (or even pets), as they won't break if knocked down.


I even had a little helper during my photo shoot. Note the sweet little fingers pointing out the different owls.

Tuesday, October 18, 2011

D.I.Y. Pine Cone Place Card Holder Tutorial.


If you have access to a lot of wee little pinecones either in your yard or a nearby park or wooded area, then this tutorial is just for you! These sweet little place card holders are a perfect accent to your holiday table, either to mark seats or to identify all that fancy food you are serving. I actually only made one, and I plan to stick scraps of paper with bible verses or inspirational words into it and keep it near my desk.


SUPPLIES. 

small or mini pine cones
jar lid (I used a Smuckers jam lid)
hot glue gun
metallic spray paint


Begin by gluing the pine cones into the lid. Start on the outside and work your way in, filling the lid. I found it easier to put the glue on the lid and then stick the pine cone in. Endeavor to keep them as upright as possible.


Go out of doors, and spray paint your card holder. Spray the bottom first, allow it to dry according to the directions on the can, and then spray the top. It's a good idea to apply two coats of paint. I didn't prime mine, but if you want it to be extra durable, or you plan to keep it in storage after the holidays, you may want to prime it first.


Once dry gently work your card between the tops of the pine cones. It's okay if it doesn't fit down very far, it should still hold the card.


I found this fun little guy sitting next to me in the yard while I was painting the card holder. So of course I had to paint him too!


Enjoy!