Monday, June 20, 2011
DIY :: Fancy Baby Girl Dress Hangers & Rosette Tutorial
Little girls get so many beautiful wee dresses. I've seen a few photos around the web where select pieces are hung on the walls of the nursery to decorate. How cute is that?! Why hang those vintage beauties in the closet when they're not in use? Stick 'em on a wall! That being said, I recently decided to add these sweet hangers to my baby-girl-gift repertoire. They're super simple and fun to make, and require only a couple materials. You have to have fancy hangers to display those pretty dresses, right?
MATERIALS: a few bits of felt in whatever color(s) you choose
scissors
hot glue gun
plastic hangers (white may be preferable)
If you decide to make your rosettes all the same color, one sheet of craft felt or a 3" strip of wool blend felt from the cutting counter will be way more than enough (plus you'll need a tiny amount of green felt for leaves).
For this project you will need to cut out one circle of felt and one leaf shaped piece for each hanger you wish to decorate. I cut circles varying in size from 1 1/2" to 2" in diameter. If you're just eyeballing it, be sure not to cut your circles too small!
To form a rosette out of a circle you will cut a spiral into it, starting from the outer edge and working your way in. Be sure to leave a small pad at the end so that you can glue the rosette together. Grab the point on the outside of the strip where you made your first cut, and begin to roll the strip, continuing to roll until you come to the end with the circular pad. (I'm holding the pad end of the strip in the top right photo, you can see the point where you want to start dangling down on the table.)
Once your strip is all rolled up and the rosette has formed, put a spot of hot glue on the back of the flower and press the pad down to hold it together. Be careful not to burn your hands with the hot glue! (And if you do, don't feel too badly, everyone does it.) Then put a bit of glue on the back of your completed rosette to attach the leaf. Once the leaf is secured, dab more glue onto the hanger and press the flower into place. I usually poke around to make sure the flower is nice and secure, adding more glue if necessary. Viola! You now have one completed hanger! (Be sure the hangers are all facing in the same direction when you attach the flowers.)
For a little variety, you can cut different leaf shapes, or scallop the edge of your circle before cutting into it. You can also add freshwater pearls, or other accents to your flowers if you wish.
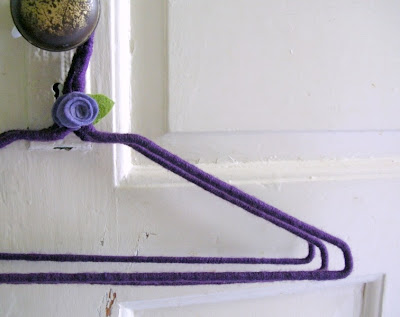
Another variation of this project is to make hangers for the grown-up ladies by wrapping a nice plastic-coated wire hanger in yarn before topping it with a rosette.
Labels:
baby girl,
baby shower,
decor,
diy,
handmade,
hangers,
nursery,
rosette tutorial,
tutorial
Subscribe to:
Post Comments (Atom)


8 comments:
Well done! And SUPER adorable! Thanks for sharing.
This is so cute Faith!! Lovely!
This is such a neat idea! Very cute for any little girl in your life. :)
Perfect and exactly what I've been thinking for the girls closet. Now to decide what to do for the husband's hangers
what a cute idea faith! i really love that purple one!
Best gift ever! Love my hangers, Faith! :)
The flowers are easy to made and sticking them to hangers makes the hanger looks more beautiful. Would love it to use this idea for my nephew.
Coat Hangers
Congratulations on your site! Really, it's great and as I saw in the first positions is true that sharing and site interface is really a boon for the work style. Really a big thank you!
voyance en ligne gratuite
Post a Comment